


Step-by-Step: Shrink Wrapping Your Boat for Winter Storage
A quality marine shrink wrap seals your boat against the elements, forming a weatherproof shell that prevents water intrusion, mold, and mildew. This guide walks you through cleaning, framing, sealing, and venting so you can wrap your boat like a pro.
A quality marine shrink wrap doesn’t just cover your boat, it seals it against the elements. When installed correctly, it forms a weatherproof shell that resists tearing, prevents water intrusion, and stops mold or mildew from taking hold in storage. It’s a simple, effective DIY winterization project that can save you hundreds each year compared to professional wrapping services. At Defender, we’ve been helping boaters prep for winter since 1938, providing the right tools, materials, and know-how for every job on deck. This step-by-step guide walks you through the complete shrink wrapping process, from cleaning and framing, to sealing and venting, so you can wrap your boat like a pro. Follow along to protect your investment, extend your gear’s life, and roll into spring with confidence.
Why Shrink Wrap Your Boat?
Unlike a standard tarp or cover, marine-grade shrink wrap forms a custom-fit, weatherproof barrier that seals out snow, ice, wind, and UV exposure. It keeps rainwater and debris from collecting on deck, prevents mold and mildew from forming below, and reduces the freeze-thaw stress that can crack fittings, trim, and gelcoat. A tight, sealed wrap also deters pests and critters looking for a winter home inside your cockpit or cabin.
In colder regions like the Northeast and Great Lakes, shrink wrap protects against snow load, ice buildup, and constant freeze cycles. In warmer climates like Florida and the Pacific Northwest, it guards against sun exposure, salt spray, and year-round moisture. No matter where you dock, the right wrap extends the lifespan of your boat’s finish, prevents costly off-season damage, and keeps your vessel ready for spring commissioning.
Tools & Materials You’ll Need
Before you fire up the heat gun, take time to gather the right tools. Shrink wrapping isn’t complicated, but having the correct gear makes the job smoother, safer, and more professional-looking. Using marine-grade materials also ensures your wrap stands up to snow, ice, and UV exposure all winter long.
Marine Shrink Wrap Film
This is the foundation of your wrap. Choose a UV-stabilized, marine-grade shrink wrap film that’s strong enough to resist wind and weather through months of exposure. Available in multiple widths and lengths, Defender’s shrink wrap film forms a tight, watertight barrier that keeps your boat clean and dry.
→ Shop Shrink Wrap & Accessories
Heat Gun or Propane Tool
A high-quality heat gun is what gives shrink wrap its signature drum-tight finish. Propane-powered marine heat tools deliver even, controllable heat for professional results. Always work in open air, keep the flame moving, and heat in broad sweeps to avoid scorching the film.
Shrink Wrap Strapping
These act as the anchor point for your entire wrap, securing the film along the hull or rub rail. A strong perimeter band ensures the shrink wrap tightens evenly when heated, maintaining proper tension through wind and temperature swings. This cross-woven polyester strapping can be drawn tight using a tensioning tool or self-locking buckles. Defender offers this in both 1/2" and 3/4" thicknesses.
Support Poles & Frame Kit
A solid frame makes the difference between a wrap that lasts all winter and one that sags after the first snow. Use adjustable support poles or a framing kit to create a central ridge line that allows rain and snow to slide off easily. The higher the pitch, the better your runoff.
Shrink Wrap Tape
Every seam, joint, and patch depends on the right tape. Marine shrink wrap tape is designed to stick securely in cold, damp conditions and resist UV breakdown. Use it to seal seams, reinforce high-stress areas, and make quick mid-winter repairs if needed.
Vents & Moisture Absorbers
Airflow is just as important as sealing. Install vent caps every few feet to prevent condensation, and add moisture absorbers or dehumidifiers inside the cabin to keep humidity under control. Proper ventilation keeps mildew, mold, and odor from building up under the wrap.
Safety Gear
Shrink wrapping involves heat and tight spaces, so safety comes first. Always wear heavy-duty gloves, protective eyewear, and a respirator mask, especially when working with propane tools. Keep a fire extinguisher nearby and avoid working near open fuel lines or vents.
Optional Add-Ons for Convenience
A few smart accessories can make your shrink wrapping job faster, cleaner, and more durable. If it’s your first time wrapping, buy a little extra film and tape. Having spares on hand makes it easy to patch mistakes or reinforce weak spots without starting over.
- Zipper Access Doors: Add quick entry points for off-season inspections or mid-winter maintenance.
- Corner & Edge Protectors: Prevent film punctures from sharp rails or hardware.
- Patch Repair Kits: Extend the lifespan of existing wraps with easy-to-use adhesive patches.
Step-by-Step: How to Shrink Wrap Your Boat
Shrink wrapping a boat may look intimidating, but with the right tools and a clear process, any hands-on boater can do it. The key is preparation and patience: the cleaner and more structured your setup, the tighter your final wrap will be. Follow these steps to create a professional, long-lasting seal that will protect your boat all winter long.
Step 1: Clean and Dry the Boat
Start with a clean surface. Dirt, grime, and salt trapped under shrink wrap can cause corrosion, mildew, and staining during storage. Wash your hull, deck, and topsides thoroughly with a marine-grade boat soap, then let everything dry completely before wrapping.
Pay special attention to hard-to-reach areas, scuppers, vents, and rails, to avoid sealing in moisture. For best results, finish with a protective wax or polish before wrapping.
→ See our Hull Prep Guide and Bottom Paint Guide
Pro Tip: Moisture is your enemy. Always allow 24 hours for drying if you’ve recently washed or waxed your boat.
Step 2: Build a Support Structure
A proper frame is the backbone of a good shrink wrap job. Without one, snow and rain can pool on the surface, stretching or tearing your wrap. Use [support poles](https://defender.com/en_us/catalogsearch/result/?q=support poles), strapping, or a framing kit to create a strong ridge line that allows water to run off evenly.
Start at the centerline and extend straps down to the gunwales or cleats, securing them tightly. The goal is to create a tent-like shape with enough slope for drainage and airflow.
Pro Tip: Add a few extra inches of height in the center to prevent sagging from heavy snow loads.
Step 3: Measure and Cut the Shrink Wrap Film
Roll out your marine-grade shrink wrap film over the top of your support frame, making sure it extends 8–12 inches below the rub rail on each side. Cut enough excess at the bow and stern to allow for overlap when sealing. Use tape to temporarily secure the film along one side while you adjust tension and alignment. Avoid stretching the film too tightly at this stage—you’ll get your final fit after heating.
Pro Tip: Always position the wrap shiny-side up for maximum UV resistance.
Step 4: Secure the Wrap to the Perimeter Band
Once your film is in place, attach it securely to your perimeter or belly band (also known as strapping). This creates the tension anchor that will hold your entire wrap in place once it’s shrunk.
Use specialized shrink wrap tape to seal the film to the band, starting at the bow and working your way aft. Overlap seams by at least 6 inches and tape them tightly to prevent gaps or wind lift.
Pro Tip: Never use duct tape. It loses adhesion in cold weather and can damage your [gelcoat](https://defender.com/en_us/catalogsearch/result/?q=gel coat).
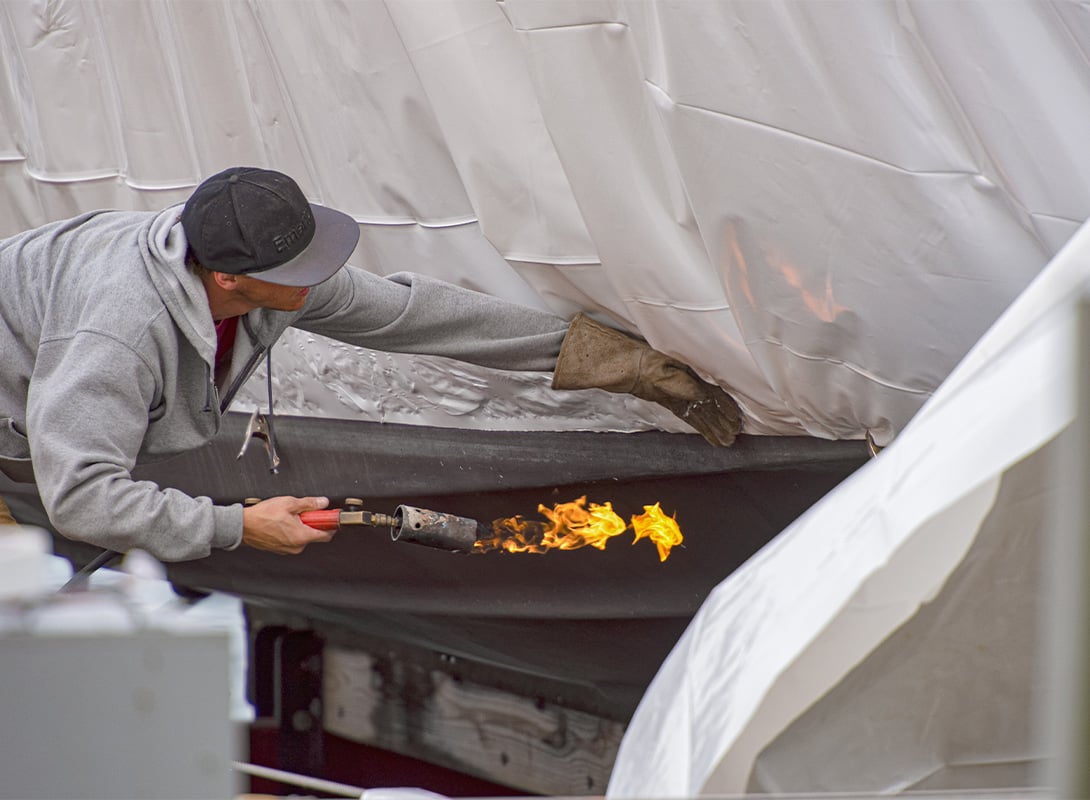
Step 5: Heat and Shrink the Wrap
Now for the fun part. Using a propane shrink wrap heat gun, start at the base of the boat and work upward in small sections. Move the heat evenly in sweeping motions to avoid scorching or melting holes in the film.
As you heat, the film will begin to tighten and form around the boat’s shape, creating a drum-tight, weatherproof seal. Pay attention to corners, cleats, and edges to ensure smooth shrinkage and even tension.
Safety Tip: Keep a fire extinguisher nearby and never use a heat gun near fuel vents, tanks, or solvents.
Step 6: Ventilate and Seal the Wrap
Once your wrap is fully tightened, install vent caps every 6–8 feet to allow air circulation and prevent condensation buildup. Add moisture absorbers or dehumidifiers inside the cabin or cockpit to combat mold and mildew during storage.
Finally, inspect the wrap for small holes or weak points and patch them with UV-safe repair tape. Double-check all seams, corners, and tie-downs for secure sealing.
→ Shop Vents & Moisture Absorbers
Pro Tip: Ventilation is as important as sealing. A tight wrap without airflow can trap moisture and encourage mildew growth.
Step 7: Inspect and Maintain During Winter
Even the best shrink wrap job benefits from a mid-winter checkup. Inspect your wrap monthly for sagging, snow load, or small tears. Remove snow buildup promptly to prevent overstressing the frame.
If you find any small punctures, patch them immediately with shrink wrap repair tape to prevent larger tears or leaks. Come spring, remove the wrap carefully. You can often recycle the film at marine recycling centers.
Regional Shrink Wrapping Considerations
Your shrink wrapping approach depends on where you store your boat. Each region brings different weather challenges — from snow and ice to salt and humidity. Use these quick regional tips to adapt your setup for local conditions.
- Northeast & Great Lakes: Cold temps and heavy snow demand strength and slope. Use heavy-duty (7 mil) film, extra support poles, and perimeter straps for added tension. Check your wrap after storms and clear snow promptly.
- Florida & Gulf Coast: Focus on UV protection and ventilation. Choose white UV-resistant film, add extra vents, and use moisture absorbers to fight mold in humid air. Always rinse salt off before wrapping. Choosing white film over other darker colors reflects both heat and UV rays, minimizing moisture buildup and keeping internal temperatures consistent.
- Pacific Northwest: Combat constant rain with airflow and drainage. Use vent caps, dehumidifiers, and a tarp overhang if needed to improve runoff and reduce condensation.
- Mountain & Inland States: Freeze/thaw cycles can loosen wraps — reinforce seams with shrink wrap tape, add cross-strapping, and protect sharp edges with foam pads or corner guards.
Common Mistakes to Avoid
Even seasoned DIYers can make mistakes when shrink-wrapping a boat. Avoid these common pitfalls to save yourself time, money, and frustration later.
- Using non-marine plastic: Standard polyethylene tarps can tear easily and don’t hold up to UV or cold. Always use marine-grade shrink wrap film.
- Skipping ventilation: A tight wrap without vent caps traps moisture — a guaranteed recipe for mildew.
- Overheating the film: Too much heat causes holes, weak spots, or uneven shrinkage. Move your heat gun continuously.
- Neglecting frame tension: Without solid support, snow and rain will pool on your wrap and eventually tear it.
- Ignoring mid-winter maintenance: Always inspect for snow load or loose seams after storms.
Shrink Wrap vs. Boat Cover: Which Is Right for You?
Shrink wrap isn’t your only winter storage option, but it’s often the most protective. Each approach has its advantages, depending on how you store, how often you access your boat, and the conditions in your region. Use this comparison to decide which solution fits your off-season needs best.
| Feature | Shrink Wrap | Boat Cover |
| Weather Protection | Fully sealed, waterproof barrier that keeps out snow, rain, and debris. | Breathable but may allow moisture ingress over time. |
| Durability | One season (disposable/recyclable). | Multi-season and reusable with proper care. |
| UV Resistance | Excellent (white or blue marine-grade film). | Varies depending on fabric and coating quality. |
| Cost | Moderate upfront investment (DIY kits typically $100–$300). | Higher initial cost ($300–$800+) but reusable for multiple years. |
| Ventilation | Requires vent caps installed manually for airflow. | Built-in breathable fabric promotes natural ventilation. |
| Installation | DIY project using heat tools and safety gear. | Simple fit-and-strap setup — no heating required. |
| Best For | Full winter storage and heavy snow-load protection. | Short-term storage, travel protection, or indoor lay-up. |
Boat Shrink Wrapping FAQs
Yes! With the right tools, materials, and patience, most boaters can DIY their own shrink wrap job. Defender offers all the tools you need to shrink wrap your own boat.
Typically one winter season, though properly installed wraps can last up to a year. Always recycle your film through a local marine recycling program.
Aim for 50°F (10°C) or warmer for best results. Cold film is more brittle and harder to seal.
For long-term winter storage, yes. Shrink wrap provides a tighter, weatherproof seal and superior protection against snow, ice, and debris.
Install vents every 6–8 feet and add moisture absorbers or dehumidifiers inside cabins or lockers.
Next Steps: More from the Defender Winterization Series
Keep your boat protected from bow to stern all season long with our complete lineup of winterization guides: