


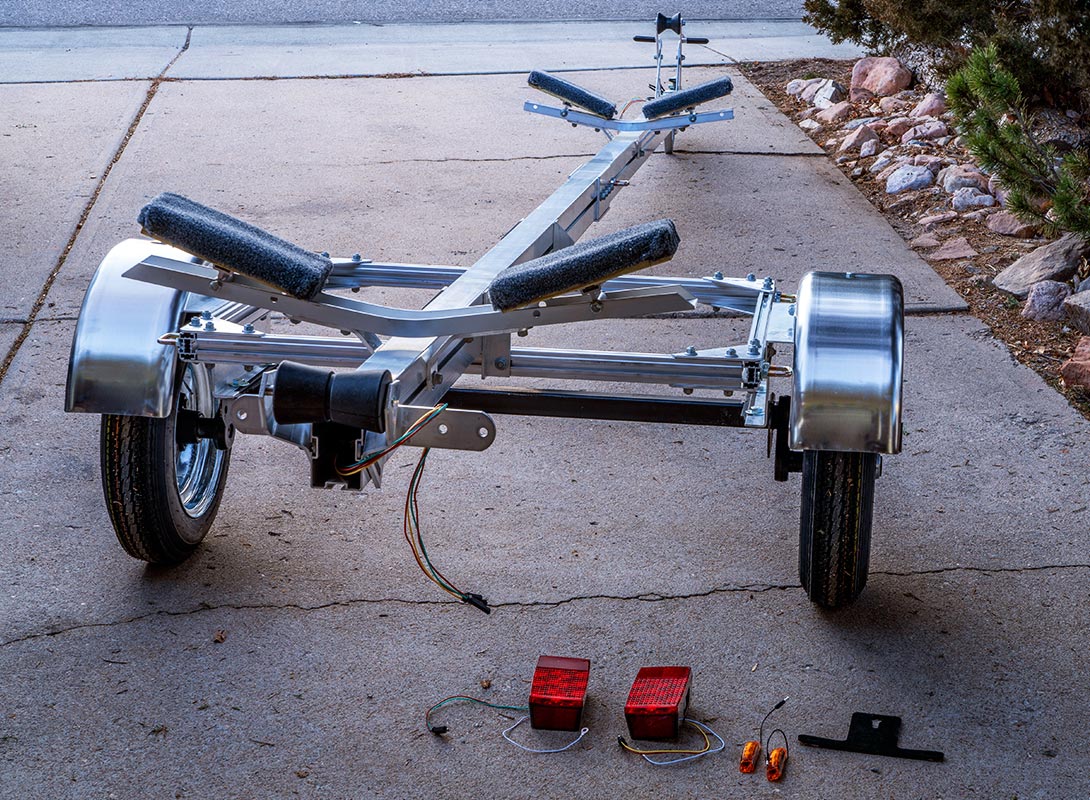
How to Change Your Boat Trailer Lights and Wiring Harness
Learn how to diagnose trailer light issues, choose marine-grade LED fixtures and the right harness, and install them step-by-step with corrosion-prevention tips and links to Defender gear.
A boat trailer’s lighting system isn’t just about visibility. It’s also about safety, compliance, and protecting your investment on every haul. Whether you’re towing down the highway at dawn or backing into a dark launch ramp at night, working lights ensure other drivers see you clearly and your trailer meets Coast Guard and DOT requirements.
Over time, however, saltwater exposure, road grime, and corrosion can wreak havoc on your trailer’s wiring and light fixtures. Dim, flickering, or completely dead lights are common signs that it’s time for a replacement. Fortunately, with the right tools, quality marine-grade materials, and a little know-how, this is a simple DIY project most boaters can tackle in an afternoon.
In this guide, we’ll walk you through how to diagnose lighting problems, choose the right replacement lights and harness, and install them step-by-step. You’ll also find pro tips to prevent corrosion, and links to Defender’s top-rated trailer lights, harness kits, accessories, and everything else you need to keep your trailer safe, compliant, and ready for the next adventure.
Diagnosing Trailer Light Problems
Before replacing your entire lighting system, it’s worth confirming what’s really causing the issue. Boat trailer lights often fail for simple reasons (e.g. loose connections, a bad ground, corroded contacts, etc.) rather than a full wiring harness failure. Taking a few minutes to test and inspect can save you time, money, and frustration.
Step 1: Testing Trailer Lights
Start by connecting your trailer to the tow vehicle ensuring there’s a solid connection between the ball and the coupler, and having a helper operate each light function: running lights, brake lights, and turn signals. If one or more lights don’t illuminate, use a 12V circuit tester or multimeter to confirm whether power is reaching the fixture.
If there is no voltage, the problem could be in the harness, the vehicle-to-trailer plug connector and/or adapter, or ground wire. If voltage is present at the wires connecting to the light assembly, but the light stays dark, it’s time to replace the fixture itself.
Step 2: Check the Trailer’s Ground Connection
Next, check the trailer’s ground connection, which is a frequent culprit in lighting issues. Make sure the ground wire is securely fastened to clean, bare metal on the trailer frame, and free from rust, paint, or corrosion.
On saltwater trailers, inspect for green or white corrosion around connectors and inside light housings which can block electrical flow. Applying a small amount of dielectric grease to the vehicle-to-trailer plug connector and/or adapter and all terminals after cleaning helps prevent future corrosion and moisture intrusion.
Step 3: Inspect Wiring Harness & Connectors
Finally, inspect your wiring harness and connectors for physical damage. Cracked insulation, pinched wires, or frayed ends are signs that it’s time for replacement.
If the trailer has been dunked repeatedly in saltwater, even “sealed” wiring may degrade over time. Replacing the full harness is often the simplest and most reliable long-term fix.
Pro Tip: Before you start any wiring work, take a few reference photos of your existing setup. It’ll make reinstallation easier and ensure that all lights are reconnected correctly later on.
Choosing the Right Replacement Lights
Once you’ve diagnosed your trailer light issues, the next step is choosing the right replacement lights for your setup. Not all trailer lights are created equal. Marine use trailer lights require fixtures and materials that can withstand water, corrosion, and constant road vibration. The right choice will depend on your trailer type, how often you launch, and the environments you tow in.
| Trailer Type | Lighting Requirements |
| Under 80” Wide and <30’ Long |
|
| Over 80” Wide, <30’ Long and <10,000 lbs |
|
Step 1: LED vs. Incandescent Lights
Modern LED trailer lights are the go-to choice for most boaters. They’re brighter, draw less power, and have no fragile filaments to burn out when trailered over rough roads. LEDs are also fully sealed, making them ideal for saltwater use and frequent submersion.
Incandescent lights, while less expensive upfront, have a shorter lifespan and are more prone to water damage and vibration failure. However, they can still be a good choice for freshwater trailers or occasional towing.
Pro Tip: Look for sealed, submersible LED trailer light kits that meet DOT/SAE standards for road use. Defender carries several all-in-one kits that include mounting hardware, wiring, and connectors for a simplified installation.
Step 2: Submersible vs. Non-Submersible Lights
If you ever back your trailer into the water, submersible lights are essential. These lights are sealed to prevent water from entering the housing and damaging internal components. For saltwater boaters, choose lights labeled “fully encapsulated” or “marine-grade sealed” for the best protection.
Non-submersible lights are fine for trailers that stay dry (for example, when towing small sailboats or jet skis stored on lifts). But for any trailer that regularly enters the water, submersible fixtures dramatically improve reliability and reduce maintenance over time.
Step 3: Shape and Mounting Style
Trailer lights come in a variety of shapes and mounting configurations, and it’s important to match your replacement lights to your trailer’s original setup. The two most common shapes are:
- Rectangular (Box-Style): Common on larger boat trailers, offering a wide lighting area and space for built-in reflectors.
- Round/Oval (Flush-Mount): Sleeker and often used for smaller trailers or custom setups.
Mounting style also matters. Your choices will be between surface-mount lights (bolt directly to the frame) or grommet-mount lights (snap into a rubber housing). Confirm that your replacements align with your trailer’s existing holes or brackets for an easy fit.
Pro Tip: Consider upgrading to a complete LED trailer light kit that includes new wiring, connectors, and mounting hardware. It ensures all components are compatible and saves time during installation.
Step 4: Match Your Wiring Configuration
Before purchasing, check your wiring connector type. While most small to mid-size boat trailers use a 4-pin flat harness, larger or more complex setups may use 5-pin or 7-pin connectors (especially if surge brakes or auxiliary circuits are involved).
Choosing lights that match your connector type prevents wiring mismatches and ensures proper operation for all light functions. Defender offers pre-wired LED light kits compatible with multiple harness types, simplifying upgrades for a variety of trailer systems.
Understanding Trailer Wiring Basics
Before you begin replacing your wiring harness, it’s important to understand the basics of how your trailer’s electrical system works. Boat trailer wiring may seem complicated, but most systems follow a universal color code and connector layout that makes testing and installation straightforward. Knowing which wire does what (and how to protect your connections) will ensure reliable performance and fewer headaches down the road.
Step 1: Common Trailer Wiring Connector Types
Most boat trailers use one of three standard connector types: 4-pin, 5-pin, or 7-pin. Each adds functionality as the pin count increases.
4-Pin Flat Connector
- The most common setup for small to mid-size boat trailers.
- Controls: Running lights, left turn/brake, right turn/brake, and ground.
- Simple and easy to replace; ideal for basic lighting systems.
5-Pin Flat Connector
- Adds one additional circuit, usually for surge brake lockout or reverse lights.
- Common on dual-axle or larger trailers that enter the water frequently.
7-Pin Round Connector
- Found on heavy-duty trailers with electric brakes, backup lights, or auxiliary power (e.g., winches or interior lights).
- Offers the most versatility but requires a compatible tow vehicle connector.
Pro Tip: When upgrading, match your new harness to your tow vehicle’s plug type or use an adapter plug for compatibility.
Step 2: Standard Trailer Wiring Color Codes
Understanding color codes helps you trace and connect wires accurately. Here’s a quick reference for typical trailer wiring.
| Wire Color | Function | Notes |
| White | Ground | Connects to trailer frame or designated grounding stud. |
| Brown | Tail / Running Lights | Feeds all marker and tail lights. |
| Yellow | Left Turn Signal & Brake Light | Connects to left-side light. |
| Green | Right Turn Signal & Brake Light | Connects to right-side light. |
| Blue | Auxiliary (Reverse / Brakes) | Found on 5-pin or 7-pin setups. |
| Black or Red | 12V Auxiliary Power | Used for backup lights or charging accessories. |
Pro Tip: When replacing your harness, always connect white ground wires directly to clean metal and coat with dielectric grease to resist corrosion, especially for saltwater trailers.
Step 3: Grounding Best Practices
A poor ground connection is one of the most common causes of trailer lighting problems. Every light must have a solid path to ground, either through the white wire or the trailer frame itself.
- Use a dedicated grounding screw or star washer to bite through paint and ensure metal-to-metal contact.
- Avoid stacking multiple grounds under one bolt—they can loosen or corrode over time.
- For aluminum trailers, run separate ground wires rather than relying on the frame to carry current.
Pro Tip: When troubleshooting dim or flickering lights, test continuity between the trailer plug ground and each light housing to confirm a solid ground connection.
Step 4: Waterproofing and Protecting Connections
Because boat trailers are frequently submerged, protecting your wiring from water intrusion is crucial. Even “sealed” systems benefit from extra precautions.
- Use heat-shrink butt connectors filled with marine-grade adhesive to seal out moisture.
- Wrap connections with self-fusing silicone tape or protective loom for abrasion resistance.
- Apply dielectric grease to plug terminals and connectors before every season to prevent corrosion.
- Route wires along the inside of the frame rails and secure with stainless steel cushion clamps or nylon cable clamps, or at the minimum with UV-resistant cable ties to prevent chafing.
Pro Tip: Defender carries a full line of marine-grade wiring accessories, including tinned copper wire, waterproof connectors, and shrink tubing ideal for harsh marine environments.
Tools & Materials You’ll Need
Before you dive into rewiring or replacing your trailer lights, make sure you have the right tools and materials on hand. Using marine-grade electrical components is key to ensuring a safe, reliable installation that can stand up to water exposure, vibration, and corrosion.
Step 1: Essential Tools for the Job
Having the right tools ready before you start will save you time and frustration during installation.
You’ll need:
- Wire strippers & crimpers: For cleanly stripping insulation and securing connectors.
- Heat gun: To shrink and seal waterproof connectors.
- 12V circuit tester or multimeter: For checking voltage and confirming connections.
- Screwdrivers and wrenches: For mounting or removing light fixtures.
- Drill and bits: If you need to create new mounting holes or secure wire clamps.
- UV resistant cable ties or cable clamps: To neatly route and secure wires along the trailer frame.
Pro Tip: Keep a magnetic tray or parts bin nearby to hold small screws, connectors, and fasteners, especially when working outdoors or at the ramp.
Step 2: Materials & Replacement Parts
Choosing marine-grade, tinned copper wire and sealed connectors will help prevent corrosion and ensure your electrical system lasts for seasons to come. Suggested materials include:
- Marine-grade wire – corrosion-resistant and ideal for trailer circuits.
- For many single-axle trailers, 16–18 AWG wire is acceptable, particularly if all lights are LED.
- Dual or triple axle trailers should use a larger 12 - 14 AWG wire with an increased length of run to ensure an adequate carriage for amps to the rear-most circuits.
- Waterproof heat-shrink butt connectors – seals moisture out of wire joints.
- Ring terminals and grounding screws – for secure frame connections.
- Dielectric grease – prevents corrosion and keeps connectors watertight.
- Wire loom or split tubing – protects wires from abrasion and UV damage.
- Waterproof LED trailer light kit – includes tail, brake, and turn signal lights.
- Replacement wiring harness (4-pin, 5-pin, or 7-pin) – match your setup for a direct fit. \
Pro Tip: Defender offers pre-packaged LED trailer light kits and wiring harness bundles that include most of these items, making replacement faster, cleaner, and more reliable.
Step 3: Safety & Preparation Checklist
Before starting your project, run through this quick checklist to ensure a smooth installation:
- Park your trailer on a flat, stable surface and chock the wheels.
- Disconnect your trailer from the tow vehicle’s electrical plug.
- Remove the old light fixtures and wiring carefully, keeping track of wire routing.
- Clean and inspect the frame grounding points before reassembly.
- Double-check that your new harness connector matches your vehicle plug type.
Taking time to prep will prevent mistakes and make wiring reinstallation much simpler. Once you have your tools, materials, and workspace ready, you’re set to move on to the next stage: installing your new trailer lights and wiring harness.
Step-by-Step Replacement Process
Now that you’ve gathered your tools and materials, it’s time to install your new trailer lights and wiring harness. This process is straightforward if you take your time and follow each step carefully. The key is keeping your wiring neat, well-routed, and fully protected from the elements.
Step 1: Remove Old Lights and Wiring
Start by disconnecting your trailer from the tow vehicle and unplugging the electrical connector. Remove the existing light fixtures, brackets, and any fasteners securing the old wiring to the frame. Take note of how the wiring was routed—this will help you run the new harness cleanly and correctly.
If the old harness is badly corroded or brittle, it’s usually best to remove it entirely rather than patching sections. Use wire cutters to carefully free the old harness, leaving any clips or grommets in place if they can be reused.
Pro Tip: Label or photograph your old wire routing before removal. It’s a simple step that prevents confusion later when installing new lines.
Step 2: Route the New Wiring Harness
Lay out your new wiring harness along the trailer frame, starting from the tongue (front) and working toward the taillight mounts. Follow the same routing path as the old harness wherever possible, keeping wires tucked inside frame channels or secured with clips. Allow for a 10-20% margin overall for wire length to allow for any routing changes or improvements.
Use UV-resistant zip ties or cable clamps to fasten the harness every 12–18 inches. Avoid sharp edges or moving parts, and always leave a little slack at connection points to prevent strain.
Pro Tip: On boat trailers, run wires along the top or inside of frame rails where they’ll be less exposed to road spray and impact.
Step 3: Connect the Ground Wire
A proper ground is essential for your lighting system to function. Scrape away any paint or rust at the grounding point before securing the wire, and apply a dab of dielectric grease over the connection to seal it against moisture.
Connect the white ground wire from the harness to clean, bare metal on the trailer frame using a ring terminal and self-tapping screw.
Pro Tip: If your trailer has an aluminum frame or painted steel, run a separate ground wire daisy-chained to connect all lights rather than relying solely on the frame.
Step 4: Test All Light Functions
Before sealing everything up, plug the harness into your tow vehicle and test each function: running lights, left turn, right turn, and brake lights. If one or more lights fail to illuminate, recheck your connections and grounding points.
Confirm that the lights are evenly bright and that both turn signals flash at the same rate. Once everything checks out, neatly secure any remaining wiring and reinstall any covers or brackets.
Pro Tip: If your trailer uses a 5-pin or 7-pin connector, don’t forget to test any auxiliary features (reverse lights, surge brake lockout, etc.) to ensure they’re working correctly.
Step 5: Install New Trailer Lights
Mount your new tail, brake, and turn signal lights according to the manufacturer’s instructions. Most light kits will specify which side is left or right (they are not always interchangeable).
Connect the harness wires to the light leads using heat-shrink butt connectors or waterproof quick-connect fittings. Match the color codes as follows:
- Brown → Tail/running lights
- Yellow → Left turn/brake
- Green → Right turn/brake
- White → Ground
Once crimped, heat the connectors with a heat gun until the tubing shrinks and adhesive flows from the ends, creating a watertight seal.
Pro Tip: For extra protection, wrap each connection in self-fusing silicone tape to guard against abrasion and UV exposure.
Step 6: Seal and Protect Your Wiring
With everything working properly, the final step is to seal and protect your new system. Apply dielectric grease to both the trailer plug and the tow vehicle socket before connecting them.
Bundle and secure any loose wire lengths with zip ties, and cover exposed runs with split wire loom for added abrasion resistance. If possible, avoid leaving wires dangling beneath the frame where they could be snagged or damaged.
Pro Tip: For extra longevity, rinse your trailer with fresh water after every saltwater launch. A quick spray helps remove salt deposits and extends the life of your wiring and connectors.
Troubleshooting Common Issues
Even with careful installation, trailer lights sometimes fail to work as expected. Most problems can be traced back to simple wiring or grounding issues, so don’t panic—troubleshooting is usually quick and straightforward. Here’s how to diagnose and correct the most common problems boaters encounter after replacing their trailer lights or wiring harness.
Issue 1: No Lights Working at All
If none of your trailer lights illuminate, start with the basics.
- Check the vehicle-to-trailer connection. Make sure the plug is fully seated and free from corrosion. Spray contact cleaner or apply dielectric grease if needed.
- Inspect the vehicle’s trailer fuse. Many tow vehicles have a dedicated fuse for trailer lighting, so be sure to consult your owner’s manual for its location.
- Verify ground continuity. Use a multimeter to ensure your trailer frame is properly grounded to the white wire in your harness.
Pro Tip: Grounding issues are responsible for more than half of trailer lighting failures. As a starting point, always clean and retighten ground points if lights go dark.
Issue 2: One Side of the Trailer Doesn’t Light Up
If only one side of the trailer works, the issue usually lies with a disconnected or damaged wire.
- Trace the wiring harness along the frame from front to back. Look for pinched, frayed, or broken wires, especially near mounting points or frame joints.
- Check your connectors. The crimp on a butt connector may have failed or loosened. Re-crimp or replace if necessary.
- Test voltage at the fixture with a multimeter. If power reaches the light, the bulb or LED module may be bad.
Pro Tip: Replace any compromised wiring rather than patching it. Water intrusion spreads quickly through corroded strands, causing future failures.
Issue 3: Lights Are Dim or Flickering
Dim or flickering lights often point to voltage loss or poor grounding.
- Confirm that all grounds are on clean, bare metal, free of rust or paint.
- Tighten all fasteners and reapply dielectric grease to connections.
- Test your trailer plug and socket (loose or dirty terminals can reduce voltage).
- On long trailers, check that wire gauge is adequate (16 AWG minimum for lighting circuits).
Pro Tip: For LED lights, flickering can also occur if the ground connection is weak. LEDs require steady voltage to maintain brightness.
Issue 4: Brake or Turn Lights Don’t Work Properly
If your brake or turn lights aren’t responding but running lights do, this usually indicates a crossed wire or connector issue.
- Check that yellow (left turn/brake) and green (right turn/brake) wires are connected correctly.
- Ensure your tow vehicle’s turn signals function normally (issues upstream can affect trailer output).
- Confirm that both left and right light housings have good individual grounds.
Pro Tip: If you’re using a 5-pin or 7-pin connector, verify that your adapter plug or extension cable is wired correctly for your trailer’s configuration.
Issue 5: Lights Work Until the Trailer Is Submerged
If your lights fail only when the trailer goes into the water, it’s likely a water intrusion or grounding problem.
- Check for cracks or gaps in the light housing seals. Replace damaged gaskets or upgrade to fully submersible LED units.
- Verify that all wire connections are sealed with adhesive-lined heat-shrink tubing.
- Inspect your frame ground (water can temporarily break poor connections).
Pro Tip: For saltwater trailers, apply corrosion inhibitor spray on connectors and terminals every few months to maintain conductivity and prevent oxidation.
Issue 6: Blown Fuse or Tripped Circuit
If a fuse blows when you plug in the trailer, you may have a short circuit.
- Disconnect the trailer and inspect the harness for any pinched or bare wires touching metal.
- Use a multimeter to test for continuity between positive and ground wires (there should be none unless a switch is on).
- Replace any damaged sections with tinned marine wire and sealed connectors.
Pro Tip: Always replace fuses with ones specifically rated for your vehicle’s trailer circuit (usually 15–20 amps). Never substitute higher ratings fuses since it could lead to disastrous results and damage - instead fix the causation issue.
Preventive Maintenance for Long-Term Reliability
- Rinse your trailer and plug assembly with fresh water after every saltwater trip.
- Apply dielectric grease to the trailer plug before each launch.
- Inspect wiring twice a season for signs of abrasion, rust, or green corrosion.
- Replace damaged or aged components early—marine environments are unforgiving.
Pro Tip: Defender carries a full range of replacement connectors, wiring harnesses, and LED light kits designed specifically for marine trailers—built to handle water, salt, and vibration far better than standard automotive components.
Maintenance Tips for Longevity
After you’ve replaced your trailer lights and wiring harness, a little routine maintenance goes a long way toward keeping them working season after season. Marine environments are tough on electrical systems, especially when saltwater, UV exposure, and vibration are part of every trip. With a few simple habits, you can dramatically extend the lifespan of your lights, wiring, and connectors.
Step 1: Rinse After Every Use
Always rinse your trailer with fresh water after every saltwater launch or recovery, especially the wiring connections and light housings. Salt deposits and road grime can quickly lead to corrosion inside connectors and light housings.
Make it a habit to flush these areas during your post-trip washdown. For extra protection, follow up with a light mist of corrosion inhibitor spray on plugs, terminals, and metal hardware.
Pro Tip: Pay special attention to the trailer tongue area and light brackets. These spots see the most splashback and salt accumulation during launches.
Step 2: Inspect Wiring and Connections Regularly
Electrical wear is gradual, so early detection makes a big difference. So you should inspect your trailer wiring every few months or before the start of every boating season, checking for:
- Cracked insulation or frayed wires along the frame
- Loose or corroded connectors at light housings and grounds
- Fading or clouding lenses on light fixtures
If you see green or white corrosion, disconnect and clean the contact points with a small wire brush or contact cleaner, then reapply dielectric grease before reconnecting and coat the impacted areas with a corrosion inhibitor spray.
Pro Tip: Use Defender’s Marine Wiring Tips Guide for a deeper look at wire sizing, color codes, and proper crimping techniques.
Step 3: Protect and Seal Electrical Components
Waterproof doesn’t mean indestructible. Even sealed LED lights and connectors benefit from extra protection in harsh marine conditions.
- Use split wire loom or conduit to shield wires from UV and impact.
- Apply dielectric grease to your trailer plug and connector pins each season.
- Replace any cracked heat-shrink connectors before corrosion spreads.
- Coat exposed frame grounds with corrosion inhibitor spray for long-term sealing.
Pro Tip: For trailers stored outdoors, cover the trailer tongue plug with a weatherproof cap or small plastic bag secured with a rubber band to keep out moisture and insects.
Step 4: Store Smart During the Off-Season
Before winter storage, disconnect your trailer from the tow vehicle and unplug the harness to prevent battery drain and moisture buildup inside the connector. Wipe everything down, apply dielectric grease to the connections, and ensure your lights are dry and clean before covering.
If storing outside, use a UV-resistant trailer cover or tarp to protect wiring and light housings from sun damage.
Pro Tip: See Defender’s Winterizing Guide for complete seasonal prep tips, including protection for your boat, trailer, and electrical systems.
Step 5: Replace Before Failure
Even the best marine wiring eventually wears out. If you notice intermittent flickering, dimming, or repeated fuse issues, it’s often more efficient to replace the harness or light kit entirely rather than chasing individual failures.
Upgrading to a new sealed LED trailer light kit is an inexpensive way to improve reliability and visibility while eliminating future corrosion headaches.
Pro Tip: Keep a small emergency lighting kit or spare LED module in your tow vehicle. If something fails on the road, you’ll have the parts to stay safe and compliant until a full repair can be made.
Conclusion & Call-to-Action
Replacing your boat trailer lights and wiring harness might seem like a big project at first, but with the right tools, quality marine-grade materials, and a little patience, it’s a straightforward DIY job that pays off for years to come. Not only will your trailer be safer and more reliable on the road, but you’ll also reduce the risk of costly electrical failures when it matters most — at the ramp.
By taking the time to diagnose problems correctly, choose the right submersible LED lights, and install everything with proper sealing and grounding, you’ve set yourself up for worry-free towing and compliance with DOT and Coast Guard regulations. A well-maintained trailer lighting system keeps you visible, safe, and confident wherever your boating adventures take you.
From LED light kits and wiring harnesses to marine connectors, corrosion protectants, and electrical tools, Defender has everything you need to keep your trailer in top condition. Explore our full range of Boat Trailer Accessories and Marine Electrical Supplies to finish your project with confidence.