


Guide to Winterizing On the Hard
When the temperatures drop and haul-out season arrives, it’s time to give your boat the attention it deserves. Winterizing On the Hard (i.e. storing your vessel out of the water) is one of the best ways to protect your hull, systems, and investment from freezing temperatures and corrosion. When done right, it means an easier spring launch and fewer costly surprises.
But winterization isn’t just about pouring in some antifreeze and walking away. From your engine and plumbing to your batteries and bilge, every system on board needs proper care and preparation to weather the off-season. Whether you’re a first-time boater or a seasoned cruiser, this step-by-step guide will walk you through everything you need to do once your boat is hauled out and blocked for winter.
At Defender, we’ve helped boaters protect their craft for over 87 years, and we know that a little prep now can save a lot of trouble later. In this guide, you’ll learn how to fully winterize your boat On the Hard, what products to use, and a few expert tricks that make spring commissioning faster and smoother.
What “On the Hard” Means (and Why It Matters)
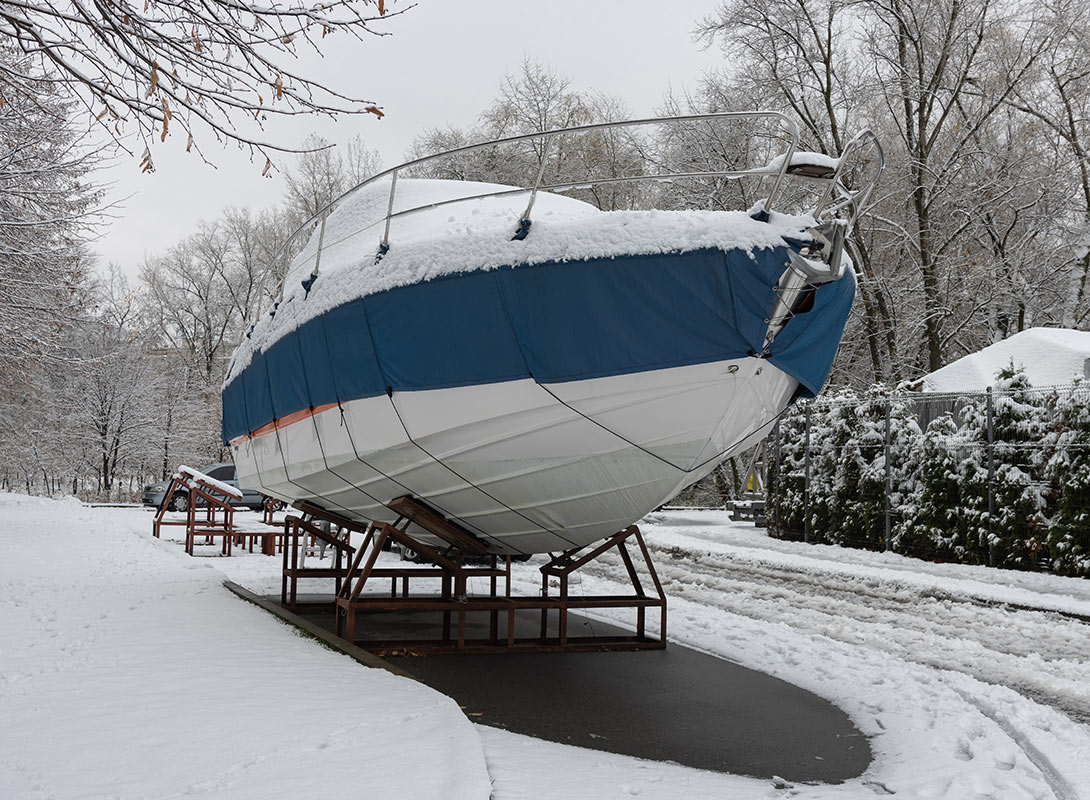
When a boat is stored “On the Hard” it means it’s been hauled out of the water and placed on land (usually supported by jack stands or cradles). This is a common practice for boaters in colder regions where winter ice, snow, and freezing temperatures can wreak havoc on hulls, thru-hulls, and onboard systems.
Hauling your boat out gives you a stable, safe environment for maintenance and prevents damage that can occur when water expands and contracts around the hull all winter long.
Unlike boats left in the water, vessels stored On the Hard are completely dry and accessible from every angle. This makes it easier to inspect, clean, and service parts that are normally submerged. You’ll also avoid risks like ice expansion around the hull, dock line chafe, and electrolysis from neighboring boats.
On the Hard is also the ideal time to tackle any bottom paint concerns, replace anodes, or service through-hulls while you’ve got full access.
Choosing to store your boat On the Hard ultimately comes down to protection and peace of mind. It’s a proactive step that keeps your systems safe from freeze damage, reduces corrosion, and sets you up for a smooth spring launch. And while it does take some work to winterize properly, doing it right (and with the right products) means less time in the yard and more time back on the water when warm weather returns.
On the Hard Winterization Checklist
Winterizing On the Hard requires a clear, step-by-step plan. The goal is simple: protect every system from freezing, corrosion, and moisture damage during months of storage. Whether you’re tackling the work yourself or supervising a yard, this checklist ensures nothing is overlooked before your boat goes into hibernation.
Before You Haul Out
Preparing your boat before it comes out of the water can make the rest of the process faster, safer, and cleaner. And there are a few key steps you should take before hauling your vessel out of the water.
- Pump out waste tanks and flush with fresh water to prevent odors and corrosion.
- Top off fuel tanks and add a fuel stabilizer to prevent varnish and condensation buildup.
- Run fresh water through engines and generators to remove salt and debris.
- Inspect bilges and sumps — remove any oil, water, or debris before hauling.
- Schedule a pressure wash to remove growth from the hull immediately after haul-out.
Suggested Defender Products
After Haul-Out
Once your boat is blocked and stable On the Hard, it’s time for a complete system shutdown and inspection. At this point, you’ll need to:
- Drain all water systems (fresh, raw, and waste) and run non-toxic marine antifreeze through each line.
- Change engine oil and filters while the engine is warm to prevent acidic buildup.
- Fog the engine (outboards only) and lubricate moving parts to protect cylinders during storage.
- Remove and store batteries in a dry, temperate place or connect to a battery maintainer.
- Inspect the hull, through-hulls, and anodes for wear or corrosion, and replace as needed.
- Check steering and control cables for stiffness and lubricate connections.
- Clean and dry interior surfaces thoroughly to prevent mildew and musty odors.
Suggested Defender Products
- Non-Toxic Marine Antifreeze
- Fogging Oil & Lubricants
- Battery Maintainers & Solar Chargers
- Replacement Anodes
- Marine Cleaners & Mildew Treatments
Final Prep and Storage
The last step is protecting your boat from the elements until spring. These steps will help protect your boat’s exterior and interior through the winter season.
- Remove canvas, cushions, and electronics for indoor storage where possible.
- Ventilate the cabin using moisture absorbers or small dehumidifiers.
- Cover the boat with a properly supported frame or shrink wrap to shed snow and rain.
- Check jack stands and blocks periodically during the off-season to ensure stability.
Suggested Defender Products
Prevention, Protection, & Preparation
A methodical approach to winterizing On the Hard ensures a hassle-free spring launch. Each of these steps protects vital systems, reduces corrosion, and helps maintain your boat’s value year after year. Defender’s full line of winterization supplies and maintenance essentials also make it easy to find the right products for your vessel, allowing you to winterize with confidence, from bow to stern.
Step-by-Step: How to Winterize On the Hard
Once your boat is safely hauled out and blocked, it’s time to move through the winterization process system by system. This is where careful attention pays off. After all, a thorough job now prevents freeze damage, corrosion, and costly spring repairs later.
Step 1: Drain and Flush All Water Systems
From freshwater lines to bilges, any water left in any part of your boat can freeze, expand, and cause serious damage. So it’s important to take the following steps to make sure that all water systems have been properly flushed.
- Start by draining freshwater and raw-water systems completely, including sinks, showers, and deck washdowns.
- Run non-toxic marine antifreeze through the freshwater system until it flows from all faucets and fixtures.
- Flush the head and holding tank with antifreeze to protect hoses and valves.
- And don’t forget air conditioning or washdown pumps where any trapped water can freeze.
Suggested Defender Products
Step 2: Protect the Engine(s)
Engines are among the most expensive components to repair after improper winterization. So taking the necessary steps to ensure that they’re protected through the winter months is nothing short of critical.
- Change the engine oil and filter while the engine is still warm to remove contaminants.
- Replace fuel filters and add a marine fuel stabilizer to prevent phase separation and varnish buildup.
- Flush the cooling system with fresh water, then run antifreeze through until it exits the exhaust.
- Fog the cylinders with fogging oil to coat internal components and prevent rust.
- Inspect belts, hoses, and clamps, and replace anything that shows wear or cracking.
Suggested Defender Products
Step 3: Clean and Prep the Hull
With your boat out of the water, this is the best opportunity to address hull maintenance. Taking these steps will ensure that your hull is not only ready for the spring season, but lasts for years to come.
- Pressure wash the hull as soon as possible after haul-out to remove growth and salt residue.
- Inspect for blisters, cracks, or gelcoat damage, marking areas that need attention before spring launch.
- Lightly sand and apply bottom paint if needed (the off-season, typically springtime, is the best time to recoat).
- Check through-hulls and seacocks for leaks or corrosion, lubricating or replacing as necessary.
Suggested Defender Products
- Bottom Paints & Primers
- Hull Cleaners & Restorers
- Thru-Hull Fittings & Seacock Lubricants
- Anodes & Corrosion Protection
Step 4: Fuel, Filters, and Batteries
Electrical and fuel systems need protection just as much as your hull and engines. After all, any moisture will lead to corrosion and, eventually, critical failures. So taking the following steps will ensure that your electrical systems are protected and ready to function properly next boating season.
- Top off the fuel tank and treat it with a stabilizer to prevent condensation.
- Drain carburetors (for gas engines) or run stabilized fuel through the system.
- Remove batteries or disconnect them; clean terminals and apply dielectric grease.
- Store batteries in a cool, dry location and maintain a trickle charge or battery maintainer throughout winter.
Suggested Defender Products
Step 5: Cover and Secure the Boat
Proper covering is your first line of defense against weather and moisture damage. This keeps away moisture and the elements that will otherwise begin to degrade both the exterior and interior of your vessel.
- Choose a fitted boat cover, a heavy duty tarp, or have your vessel professionally shrink wrapped for full protection.
- Use support poles and vents to prevent pooling and promote airflow.
- Seal hatches and ports but allow for some ventilation to prevent mildew.
- Inspect the cradle or jack stands periodically through the off-season to ensure the boat remains stable and supported.
Suggested Defender Products
- Boat Covers & Shrink Wrap Kits
- Ventilation Poles & Support Systems
- Moisture Absorbers & Cabin Ventilators
- Boat Stands & Storage Accessories
Taking Care to Take Precautions
A careful winterization ensures your boat is protected from top to bottom through the harshest conditions. By following these steps — and using quality products designed for marine use — you’ll minimize maintenance costs, protect your investment, and make next spring’s launch a simple, stress-free experience.
Pro Tips from Defender Experts
Every boat and every boater is different, but a few universal best practices can make the winterization process smoother, safer, and more effective. After decades of helping customers prepare for haul-out season, Defender’s technical team has compiled these key insights to help you avoid the most common mistakes and tailor your approach to your region.
Best Practices for Successful Winterization
First, start early. Don’t wait for freezing temperatures to begin winterizing. Sudden cold snaps can cause costly damage overnight. Aim to complete the process well before the first hard frost.
Next, work from the inside out. Begin with the systems most vulnerable to freezing (fresh water, sanitation, engines) before focusing on topside cleaning and covering.
Label everything as you go. Use masking tape or waterproof labels to mark hoses, wires, and access panels. This small step saves confusion and time when you recommission in spring.
Also inspect as you go. Haul-out is the ideal time to spot potential issues (such as cracked hoses, loose clamps, corroded fittings) before they worsen during storage.
And document your work. Keep a written checklist or take photos of key systems once they’re winterized. You’ll thank yourself later when it’s time to reverse the process.
Suggested Defender Products
Common Mistakes to Avoid
Even experienced boaters can miss a few critical steps that lead to big problems later. So make sure to avoid these pitfalls for a worry-free winter:
- Using automotive antifreeze. Only use non-toxic marine antifreeze. It’s safe for potable systems and designed for marine materials.
- Neglecting the bilge. Trapped water in bilges and sumps can freeze and crack fittings or damage pumps. Always dry and treat bilges with antifreeze.
- Leaving electronics exposed. Moisture can corrode terminals and contacts. Remove portable devices, and cover or disconnect sensitive equipment.
- Skipping ventilation. A tightly sealed boat without airflow can trap moisture, leading to mildew and odors. Use moisture absorbers and vent all covers.
- Forgetting batteries. Unmaintained batteries can discharge completely and freeze. Disconnect and keep batteries in a dry location.
Suggested Defender Products
- Non-Toxic Marine Antifreeze
- Moisture Absorbers & Dehumidifiers
- Battery Maintainers & Monitors
- Boat Covers
Regional Considerations
Winterization needs vary depending on where you store your boat, but the fundamentals remain the same: protect against moisture, corrosion, and freezing.
- Northeast & Great Lakes: Focus on freeze protection. Drain every system completely and use marine antifreeze rated to at least -50°F. Inspect through-hulls and drains for ice expansion risks.
- Pacific Northwest: Humidity is the bigger concern. Emphasize ventilation and mildew prevention with dehumidifiers and moisture control products.
- Mid-Atlantic & Coastal South: Mild winters still bring condensation and salt corrosion. Flush systems thoroughly and coat metal fittings with corrosion inhibitors.
- Florida & Gulf States: Even if you don’t face freezing temperatures, lay-up storage demands UV protection, fuel stabilization, and moisture management. Cover well and guard against heat buildup.
Suggested Defender Products
Winterizing On the Hard with the Defender Difference
Winterizing isn’t just about surviving the cold. It’s about preserving performance and value. Defender’s team of experts has helped boaters navigate every type of storage scenario, from icy New England marinas to year-round southern slips. With decades of experience and one of the most comprehensive selections of marine-grade maintenance products, Defender makes it easy to winterize the right way.
Marine Space Heater FAQs
Key safety and performance considerations should guide every aspect of heater selection and use aboard. Proper installation, operation, and maintenance are essential to ensure reliable performance and prevent onboard hazards during the winter season. And the following FAQs address key safety and performance considerations when using space heaters aboard.
Yes, you can use a space heater on a fiberglass boat as long as it is marine-rated and equipped with tip-over and overheat protection. Always place the heater on a stable, nonflammable surface and ensure adequate ventilation to prevent overheating and moisture buildup.
The safest heaters for sleeping aboard are sealed-combustion diesel or solid-fuel models that vent exhaust outside the cabin. These systems provide consistent, dry heat while eliminating the risk of carbon monoxide buildup inside enclosed spaces.
Yes, you can run a heater from shore power if your electrical system is properly rated and in good condition. Always use marine-grade cords and outlets, ensure connections are dry and corrosion-free, and avoid overloading circuits to maintain safe, continuous operation.
Stay Warm, Stay Safe, Stay Afloat
Preparing your boat for winter is about more than just staying warm. It’s also about protecting your investment and ensuring onboard safety. The right marine space heater, paired with proper insulation and ventilation, helps maintain comfort while preventing moisture damage throughout the cold season.
Whether you live aboard full-time or visit your boat during off-season maintenance, reliable heat makes all the difference. Explore Defender’s full range of marine heaters and winterizing supplies to keep your vessel warm, dry, and ready for launch when spring returns.