


How to Install an Anchor Windlass (Step-by-Step DIY Guide)
A well-functioning windlass takes the strain out of anchoring and gives you the control you need when the conditions turn rough. But as much as installing one is a smart and valuable upgrade to your vessel, it demands clear planning and precise execution to work the way you expect it to.
Before you pick up a drill, read your windlass owner’s manual. It contains model-specific details that are critical for the reliable performance of your windlass, and it will help you confirm that you have the right tools to build an anchoring system that works smoothly when you need it most.
But you can also rely on this guide to take you step-by-step through installing your new windlass, from preparation and planning to installation and maintenance.
Before You Begin: Understanding Windlass Types & Requirements
Before you install a windlass, it’s important to understand how different models, mounting styles, and system requirements affect your boat. Each windlass has specific electrical demands, deck layout needs, and rode compatibility that determine how well it will perform once installed. Taking the time to evaluate these factors upfront ensures you choose the right unit and set yourself up for a smooth, reliable installation.
How to Choose the Right Windlass for Your Boat
Choosing the right windlass starts with matching its pulling power to your boat’s length and displacement, ensuring it can lift your anchor and rode without strain. You should also confirm that the gypsy is fully compatible with your rope and chain size to prevent slipping or jams during operation.
Motor duty cycle matters just as much, because a windlass that overheats under repeated use won’t perform when you need it most. For help comparing models and selecting the right fit for your vessel, reference the Windlass Selection Guide.
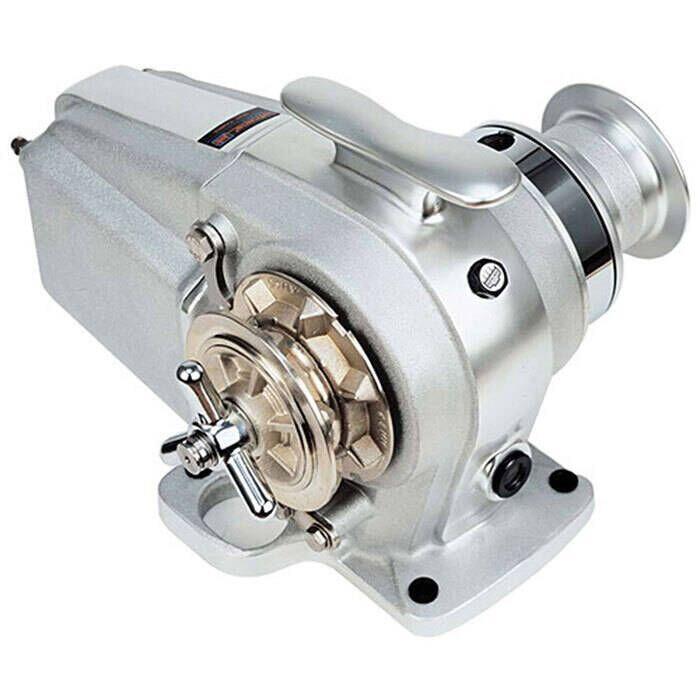
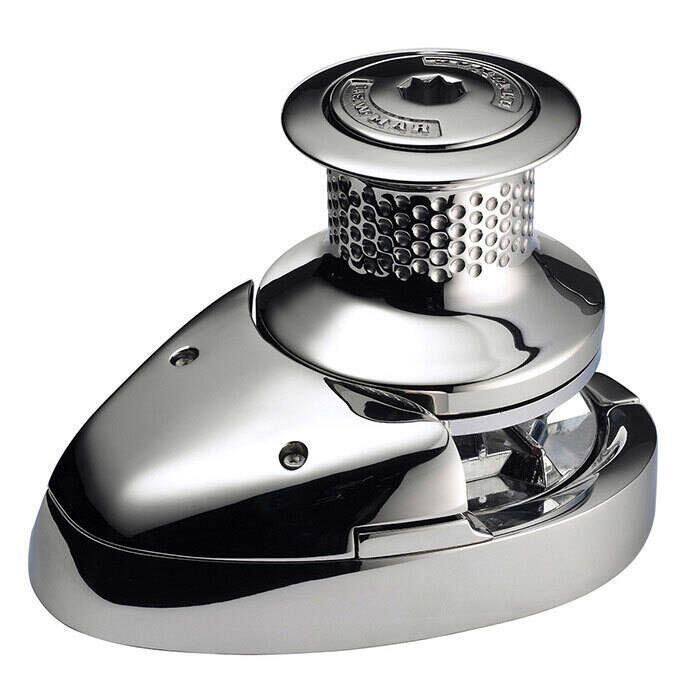
Horizontal vs Vertical Windlasses
Horizontal windlasses are easier to install and work well on boats with limited below-deck space because the motor sits above deck. They also handle rode alignment reliably on many foredeck layouts, especially when your chain-locker (or anchor locker) geometry is tight.
Vertical windlasses require deeper chain lockers for proper rode fall, which can limit their use on some boats. Their below-deck motor placement reduces deck clutter but can complicate installation in cramped or irregular spaces.
Shop Popular Windlasses & Accessories

Tools & Materials Checklist
You’ll need drilling tools, hole saws, marine sealant, and proper backing plates to create a strong and watertight mounting base for your windlass. Make sure you also have layout templates, marking tools, and the right fasteners on hand to complete the mechanical installation.
For the electrical work, gather marine-grade wiring, breakers, solenoids, connectors, and heat-shrink terminals that match your windlass specifications. Some boats may also benefit from a dedicated battery to reduce voltage drop, so review your electrical layout carefully before you begin
Shop Marine Electrical
Step 1: Plan Your Installation
Planning your installation is the most important step because it determines how well your windlass will perform once it’s mounted. Before you drill anything, confirm your deck can handle the load and verify that the motor has enough clearance below. Taking the time to map out alignment, wiring routes, and rode flow now prevents headaches and expensive corrections later.
Assess Deck Strength, Thickness & Reinforcement Needs
Your deck must be able to handle the loads created by anchoring, so evaluate its thickness, core material, and overall condition before committing to a mounting location. If the deck shows signs of weakness, reinforce it before installing the windlass.
Use backing plates or structural pads to spread the load across a wider area and prevent stress cracking over time. Proper reinforcement will ensure that your windlass performs reliably in real-world anchoring conditions.
Rode Path & Chain Locker Planning
Your windlass needs a clean rode path with a minimum drop of 12–18 inches to keep the rope and chain from piling up in the locker. Without smooth fall, the system will jam and strain the motor.
Make sure the path from bow roller to gypsy is straight and free of obstructions that could cause chafe or misfeeds. Planning this layout early helps you avoid problems that are difficult to fix after installation.
Layout Templates & Mounting Positioning
Use the manufacturer’s template to mark bolt holes and shaft locations accurately before drilling. This ensures the windlass aligns correctly with your bow roller and rode path.
Also, check motor clearance below deck to prevent interference with bulkheads, wiring, or anchor-locker structures. And adjust your mounting position now if needed, because mistakes become permanent once holes are drilled.
Safety Considerations Before You Drill
Wear proper eye protection to keep fiberglass dust and debris out of your eyes. Work slowly and cleanly to reduce hazards around the foredeck.
Disconnect your batteries before the electrical portion of the installation to prevent accidental shorts or shock. And always isolate power at the breaker or switch panel.
Finally, check under-deck clearance before drilling to avoid hitting wiring, plumbing, or structural supports. And just like you should always ‘measure twice, cut once’, confirm every hole location twice so you don’t damage critical systems.
Step 2: Prepare the Deck
Preparing the deck is essential because a windlass needs a solid, flat and sealed foundation to handle heavy loads without leaking or shifting. This step includes marking and drilling holes, protecting any cored construction, and reinforcing the area with proper backing. When you take the time to prepare the deck correctly, every part of the installation that follows becomes stronger and more reliable.
Mark and Drill Holes
Use the mounting template to mark all bolt locations, the chain pipe opening, and any shaft penetrations with precision. Drill pilot holes first to confirm alignment before committing to full-size cuts. Once confirmed, enlarge the openings with the proper bits or hole saws to create clean, accurate passages for hardware and rode.
Core Sealing for Cored Decks
Cored decks must be protected from water intrusion, so follow the critical over-drill, epoxy-fill, and re-drill process. Over-drill each hole to remove core material around the penetration and then fill the void with thickened epoxy. Once cured, re-drill to the final hardware size to create a fully sealed and long-lasting barrier against rot.
Install Backing Plates & Reinforcement
Backing plates spread load across the underside of the deck, giving the windlass a secure and stable foundation. Fit each plate so it sits flat without rocking or stressing the laminate. Use stainless or aluminum plates sized appropriately for your windlass to ensure strong, dependable reinforcement.
Bedding the Windlass Base with Marine Sealant
Apply marine sealant generously to the windlass footprint to create a watertight bond between the base and the deck. Make sure to seal thoroughly around mounting screw holes because they are common points of water intrusion. And choose durable marine-grade sealants and adhesives to ensure a long-lasting installation.
Step 3: Install the Windlass Mechanically
With the deck prepped and sealed, you can set the windlass in place and secure the hardware that keeps everything aligned under load. This step ensures the unit sits correctly on the deck and interfaces cleanly with the bow roller and rode. Taking your time here pays off because proper mechanical alignment prevents early wear and frustrating jams down the line.
Mount the Windlass and Check Alignment
Set the windlass onto the cured sealant bed and install the mounting bolts loosely so you can fine-tune its position. Align the gypsy with the bow roller to ensure the rode feeds smoothly across the deck. Once alignment is confirmed, tighten the bolts evenly to lock the windlass into place.
Install Gypsy/Rode Components
Attach the gypsy according to the manufacturer’s instructions and verify that it matches the rope and chain sizes you plan to use. Spin it by hand to confirm smooth rotation and proper seating. And check the clutch adjustment, as well, so the system engages cleanly without slipping.
Verify Rode Flow Into Locker
Next, feed the rode through the windlass and into the locker to make sure it drops freely without piling up. If the fall is uneven or too shallow, adjust the mounting angle or add a simple deflector to guide the line. And switching to eight-plait rode or repositioning the locker hardware can also improve flow in tight spaces.
Step 4: Electrical Installation
A windlass draws heavy current, so the electrical work needs to be done carefully and deliberately to avoid performance issues or safety risks. This step covers wiring requirements, breaker protection, control placement, and system testing. When everything is sized and connected correctly, your windlass will run smoothly and reliably when you need it.
Understanding Windlass Electrical Loads
Windlasses require wire gauges sized for high current draw, so follow the manufacturer’s chart to avoid overheating or weak performance. Undersized wiring leads to voltage drop, which reduces pulling power when it matters most.
Your breaker and solenoid must also match the windlass’s rated load, or the system may trip or fail under strain. Choosing components with proper amperage ratings protects your wiring and keeps your installation safe.
Running the Power Cables
Route all power cables along smooth, protected paths to avoid abrasion and heat exposure that can damage insulation. Use chafe guards wherever wires pass through bulkheads or tight spaces.
Select marine-grade wire and connectors to handle moisture, vibration, and high current loads [Interlink: Marine Electrical Supplies]. Keep cable runs as short and direct as possible to minimize voltage drop.
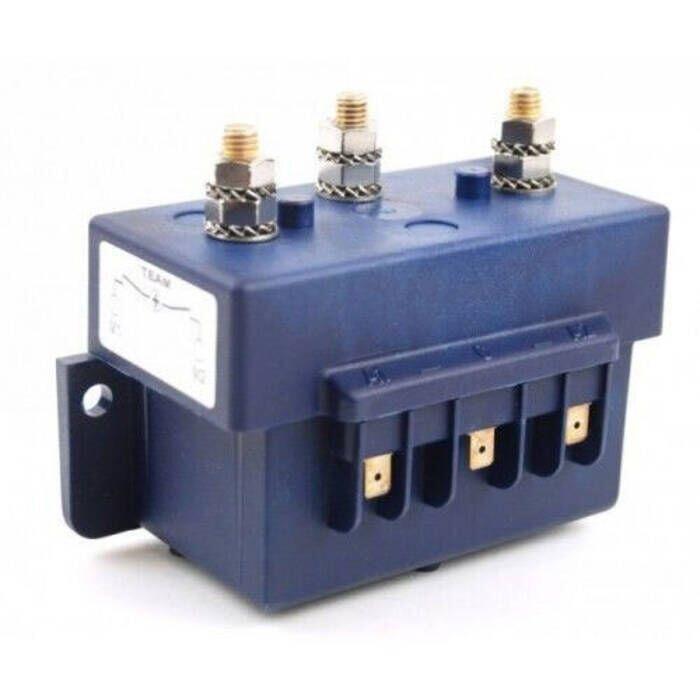
Installing the Solenoid / Contactor
Mount the solenoid in a dry, accessible area where it won’t be exposed to excess heat or moisture. Follow the wiring diagram precisely because even small errors can cause the system to malfunction.
Label each wire during installation to simplify future troubleshooting and service. Secure all terminals tightly to ensure strong electrical contact under heavy loads.
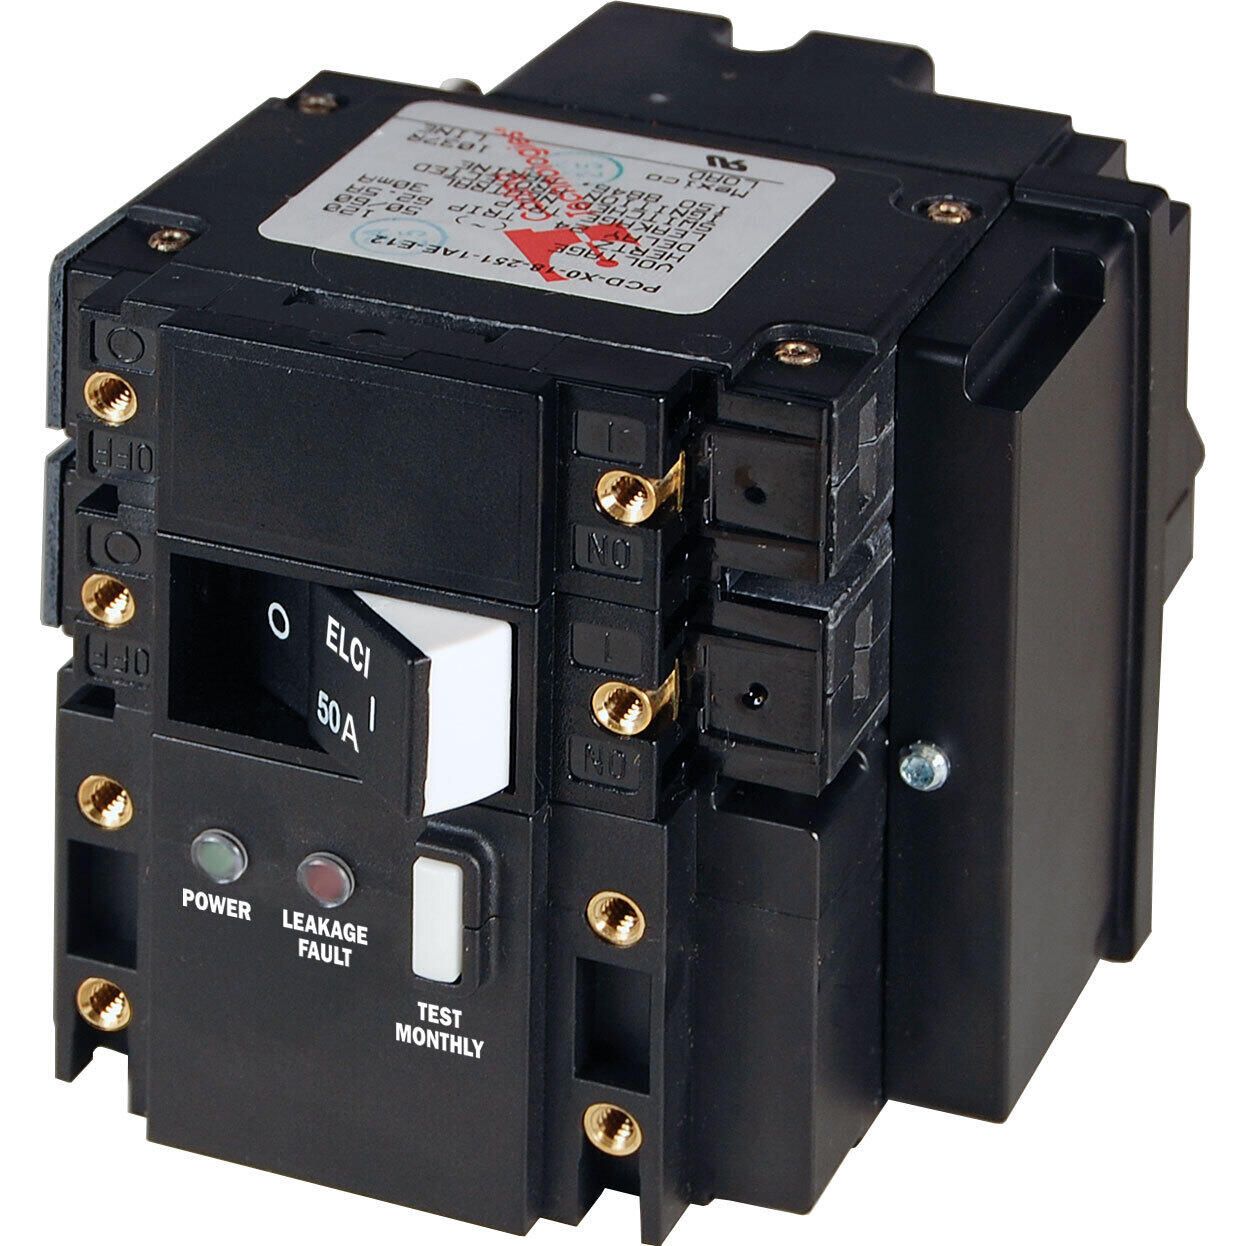
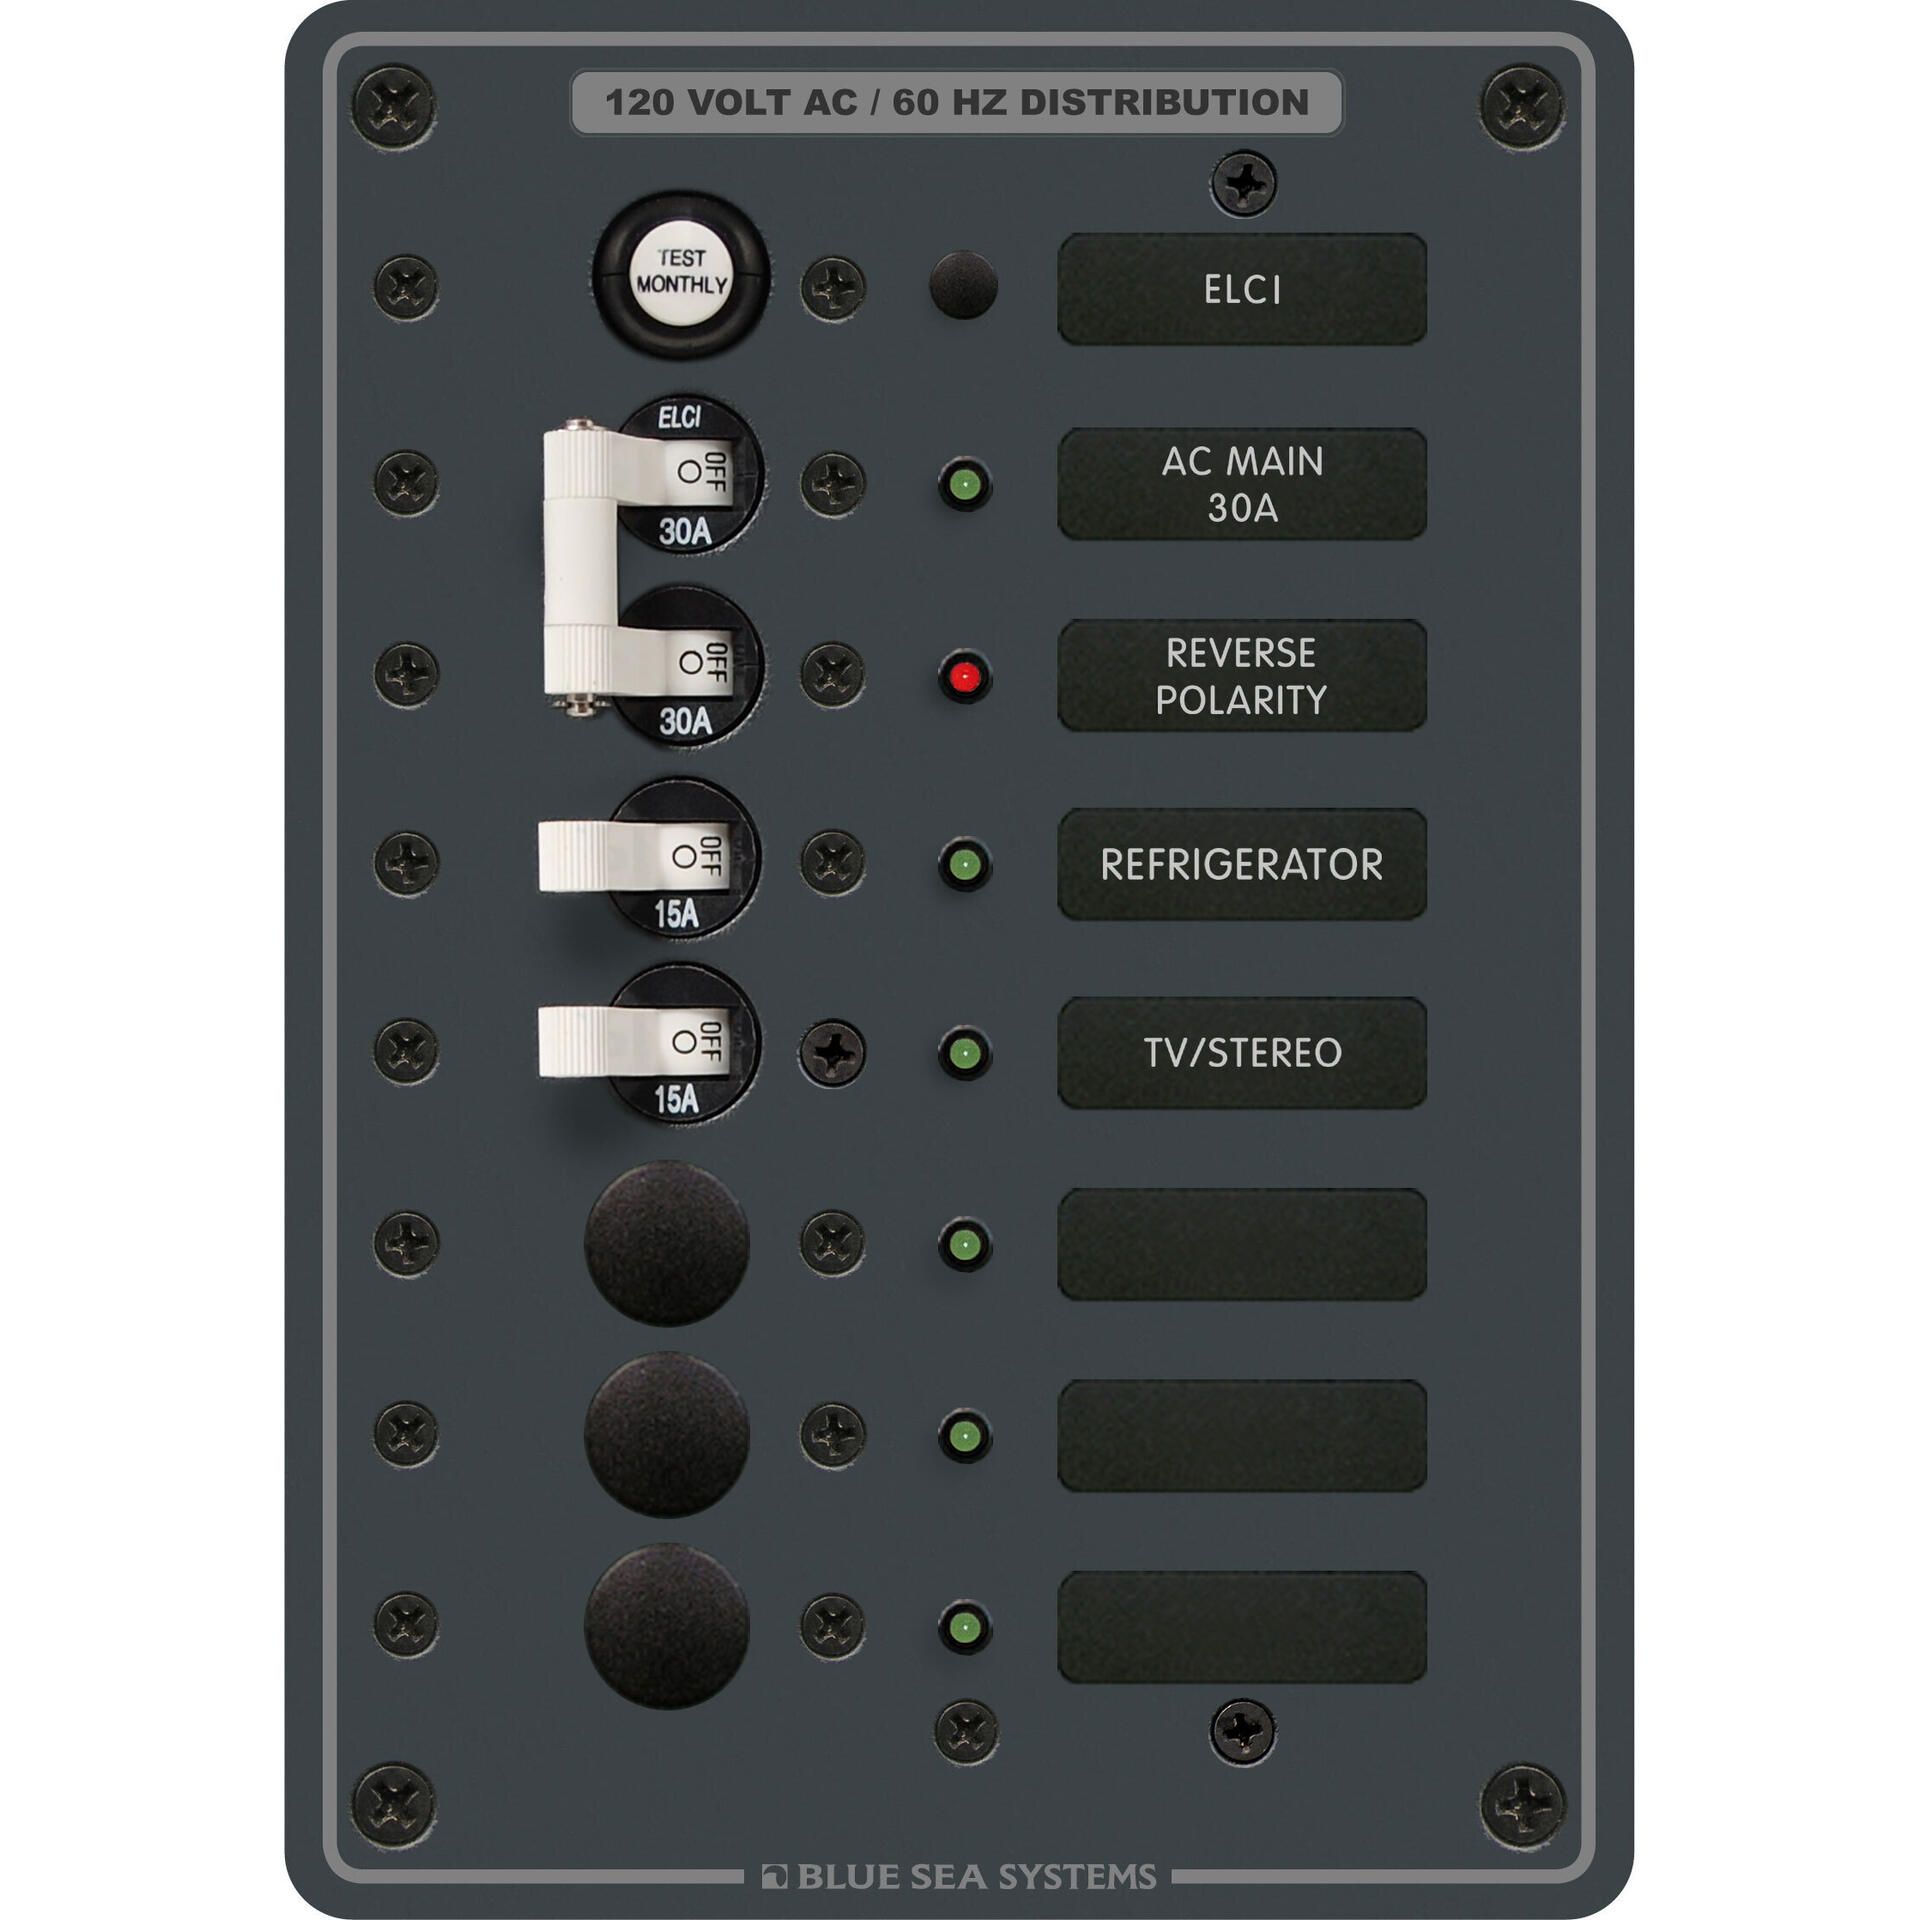
Installing Circuit Breakers & Reset Switches
Install the breaker close to the power source so it can protect the system from overloads right at the start of the run. Make sure the breaker’s amperage rating matches the windlass manufacturer’s specifications.
Use corrosion-resistant hardware and mount the breaker somewhere you can reach quickly during emergencies. Proper placement also makes maintenance easier over the life of the system.
Installing Foot Switches or Helm Controls
Mount foot switches where you can reach them safely without stretching or losing balance on the foredeck. Always confirm full below-deck clearance before drilling any holes for the switches.
Helm controls should use waterproof switches and clean routing through the console wiring. And keep all connections secure and protected from spray to ensure long-term reliability.
Electrical Testing & Troubleshooting
Test the windlass under no load first to verify proper motor direction and switch operation, including both up and down functions. Slow operation or dimming lights often indicate voltage drop from long runs or undersized wire.
Common wiring mistakes include reversed polarity, loose terminals, and poorly crimped connectors. If breakers trip repeatedly, inspect wiring for shorts, crushed cables, or incorrect breaker sizing.
Shop Marine Electrical
Step 5: Rode, Chain, and Anchor Setup
Your windlass can only perform as well as the rode and chain you pair with it, so this step focuses on choosing and preparing components that feed smoothly and hold strong. Matching the right materials to your windlass gypsy prevents jams and improves anchoring reliability. Taking the time to set up your rode system correctly will give you dependable performance in real-world conditions.
Choosing Anchor Rode
Select rope and chain that match your windlass’s gypsy specifications to ensure smooth engagement and retrieval. Three-strand and eight-plait lines both work well, but eight-plait stacks more compactly in tight lockers. For help choosing the right combination, reference your windlass’s specifications as well as our Rope Strength Guide.
Splicing Rope-to-Chain Connections
Use a proper windlass-compatible splice so the transition between rope and chain passes cleanly over the gypsy. Test the splice by running it manually through the windlass before committing to full operation. A clean, tight splice protects the rode from chafe and keeps the system performing smoothly.
Testing the Haul & Free-Fall
Run the windlass under light load to confirm the rope and chain feed cleanly in both directions. Listen for slipping or clicking that may indicate misalignment or tension issues. Test free-fall if your model supports it, and make any necessary adjustments before relying on the system.
Load Testing on a Cleat, Not the Windlass
A windlass is designed to lift the anchor, not to hold the boat at anchor under strain. Once the anchor is set, always move the load to a cleat or bridle. This simple habit protects the windlass gears and extends the life of your entire anchoring system.
Step 6: Safety, Maintenance & Best Practices
A windlass is a hardworking piece of gear, so using it correctly and maintaining it regularly will keep it performing when you need it most. This step covers safe operation, basic upkeep, and common mistakes that shorten a windlass’s lifespan. Following these best practices protects both your equipment and your crew.
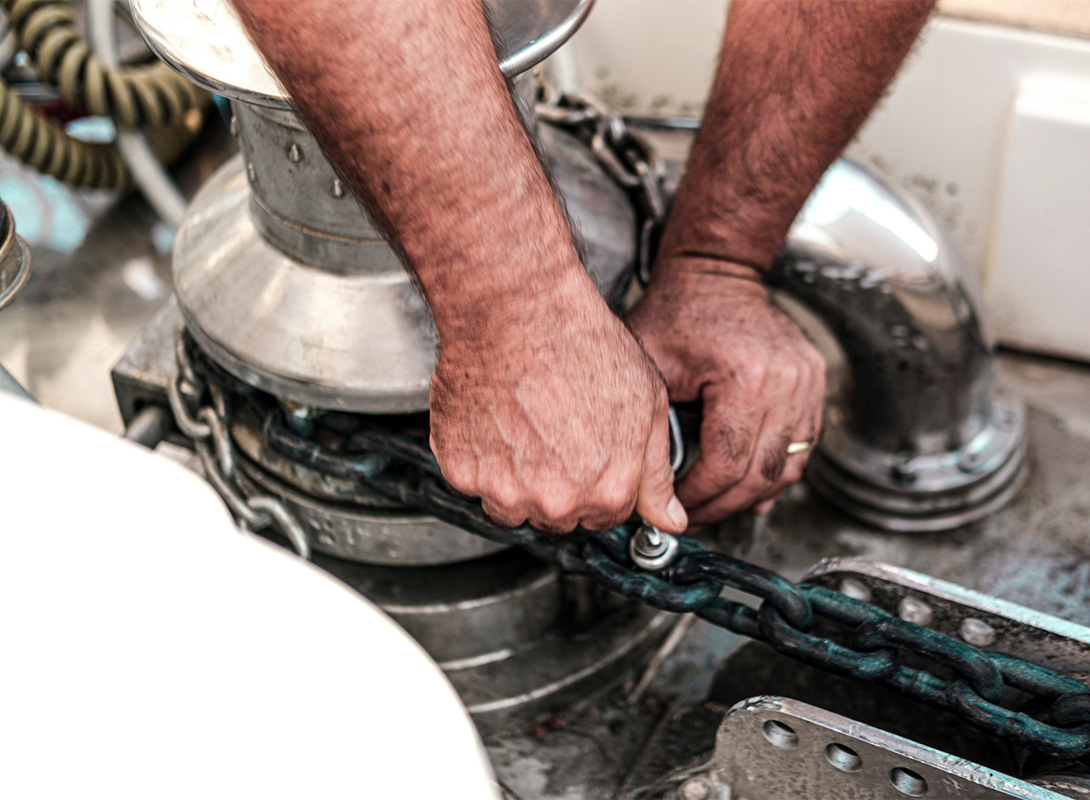
Operating the Windlass Safely
Keep hands, feet, and loose gear clear of the gypsy at all times because the windlass can grab unexpectedly. Move slowly and stay balanced when operating on a rolling foredeck.
Never let the windlass absorb shock loads from waves or sudden shifts in tension because that can damage internal gears. Make sure to use a snubber or transfer the load to a cleat once the anchor is set.
Preventative Maintenance Schedule
Inspect the windlass regularly for loose bolts, corrosion, or damaged wiring, especially if you boat in saltwater. A quick monthly check can prevent long-term issues and expensive repairs.
Clean and lubricate moving parts as recommended by the manufacturer to keep the mechanism operating smoothly. And make sure to rinse the windlass with fresh water after each trip to remove salt and grit.
Common Installation Mistakes to Avoid
Undersized wiring is one of the most common problems and leads to voltage drop and weak pulling power. Always size cables according to the manufacturer’s chart.
Poor locker geometry causes jams, and failing to reinforce cored decks invites rot and structural damage over time. And never use the windlass as a cleat because the gears are not designed to hold anchoring loads.
Windlass Troubleshooting Guide
Even a properly installed windlass can run into issues when the system is under strain or components wear over time. This section of the windlass installation guide highlights the most common problems and how to diagnose them quickly. After all, knowing what to look for helps you fix issues before they turn into bigger headaches.
Windlass Won’t Power On
Start by checking the breaker, battery voltage, and main power connections because loose or corroded terminals are frequent culprits. Make sure the solenoid is receiving power and that control switches are functioning correctly.
If everything checks out, trace the wiring for damaged insulation or crushed sections that may be interrupting the circuit. A multimeter can help pinpoint where power is being lost in the run.
Windlass Slips Under Load
Slipping usually points to a worn gypsy or a mismatch between your rode size and the gypsy profile. Inspect the chain and rope to confirm they match the manufacturer’s specifications.
A loose or improperly adjusted clutch can also cause slipping, especially under heavier loads. So make sure to tighten the clutch according to the manual and re-test under light tension.
Rode Jams in Locker
Jams often occur when the chain locker doesn’t have enough vertical drop to let the rode fall freely. Rearranging locker components or increasing the fall can improve performance immediately.
If the rode piles up instead of spreading out, consider switching to eight-plait line or installing a simple deflector. Both options help the rode settle more evenly and reduce the need for manual clearing.
Overheating Motor
A windlass motor that overheats is usually being run too long without rest or is working against excessive load. Follow the duty cycle guidelines to avoid premature wear or shutdowns.
Voltage drop from long or undersized wiring runs can also make the motor run hot. So check your cable gauge and connection quality to ensure the system is getting full power.
Windlass Product Recommendations
Windlass Installation FAQs
Yes, every windlass requires its own breaker sized exactly to the manufacturer’s specifications. This protects the wiring and motor from overload during heavy pulls. It also makes troubleshooting easier by giving you a single, clear point of system protection.
Only if your locker already has enough vertical drop and space for the rode to fall cleanly. Without proper fall, the rode will pile up and cause jams during retrieval. Always check locker depth before committing to a mounting location.
Start by inspecting deck thickness, stiffness, and the condition of the core from both above and below. Soft spots or flexing under pressure usually mean reinforcement is needed. Installing backing plates is often the simplest and most effective way to ensure strength.
Horizontal windlasses mount completely above deck and work well when you have shallow lockers or tight foredeck layouts. Vertical windlasses require deeper chain lockers but keep more of the mechanism below deck for a cleaner look. Choosing between them depends on your deck layout and locker geometry.
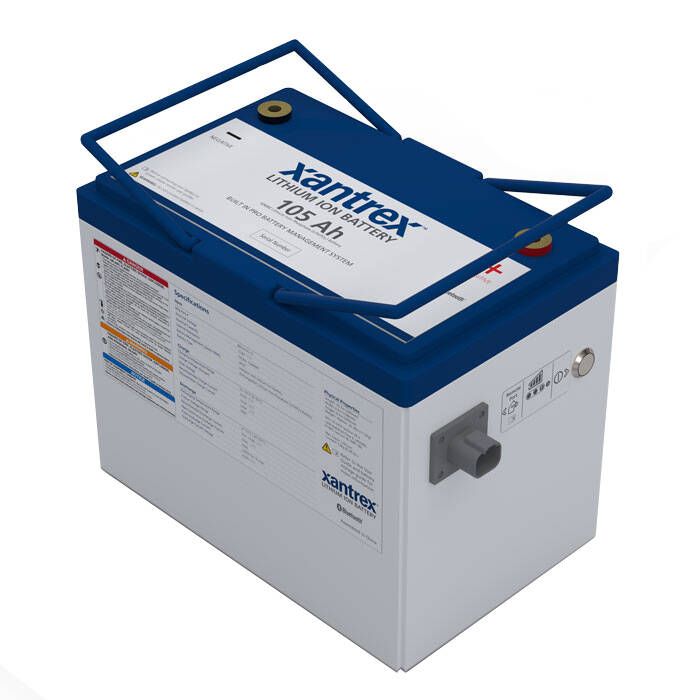
Yes, but long cable runs or high loads may cause voltage drop and reduce pulling power. You’ll get more consistent performance with a battery mounted closer to the bow. Always size your wiring properly regardless of which battery bank you use.
Yes, because the solenoid handles the high current switching safely and reliably. Without it, your control switches would need to carry load they aren’t built for. A solenoid also protects your wiring and makes future troubleshooting easier.
Always match the rope diameter and chain link size to the gypsy specifications listed in your manual. Using the wrong rode is one of the most common causes of windlass jams and slippage. When in doubt, check the manufacturer’s chart or ask an expert before purchasing.
This usually means voltage drop caused by undersized wiring, weak batteries, or poor connections. High current draw exposes weaknesses in the electrical system quickly. Check cable gauge and terminal integrity to ensure the motor gets full power.
Can I use my windlass as a cleat once the anchor is set?
No, because windlass gears are designed for lifting, not holding the boat under load. Using it as a cleat can strip gears or overheat the motor, leading to expensive repairs. Always shift the load to a cleat, snubber, or bridle once the anchor is set.